Main Course Films 将 Apple Immersive 纪录片《Thé Fine Dining Bakery》转制为 4K 2.40:1 版本
Creating 4K from Apple Immersive (AIV)
Main Course Films 把 2025 年完成的 Apple Immersive Video 纪录片《Thé Fine Dining Bakery》转制为 4K Scope、2.40:1、7.1 环绕声的常规版本,称这是首部完整转制的 AIV 影片。
完整拆解一部 Apple Immersive Video 纪录片转制 4K 的流程,涵盖去畸变、色彩管理与空间音频降混的具体做法。
One of the primary issues when choosing a shooting format is ensuring the footage can be adapted to the many delivery formats used in modern cinema. This is especially true of immersive filmmaking. Until recently, options for reformatting footage shot in immersive formats, such as Apple Immersive Video, were extremely limited.
More than a year after completing Thé Fine Dining Bakery, Main Course Films (MCF) has released what it describes as the world’s first Apple Immersive Video (AIV) film converted in full for conventional, non-immersive viewing. The AIV documentary short has been reformatted into the more standard 4K Scope, with a 2.40:1 aspect ratio and 7.1 surround sound. The original immersive version, completed in mid-2025, remains available on the Fovii and Theatre streaming platforms for Apple Vision Pro. But now the film can also be enjoyed on conventional screens. This option to additionally reach a wider audience makes advanced formats such as AIV more appealing to Producers.
This is a significant milestone for the Apple Immersive Video (AIV) format. Until now, AIV footage shown outside Apple Vision Pro has largely consisted of headset screen captures, complete with the viewer’s head movements, VR conversions for YouTube, or individual shots separately edited for marketing use.
The Apple TV film Bono: Songs of Surrender, which we covered last year, was released in both immersive and non-immersive versions, but it took a different approach. Rather than reformatting a completed immersive film, the production shot selected sequences simultaneously with immersive cameras and an ARRI ALEXA 65. Stereoscopic graphics and animated drawings were also separately added to the immersive version.
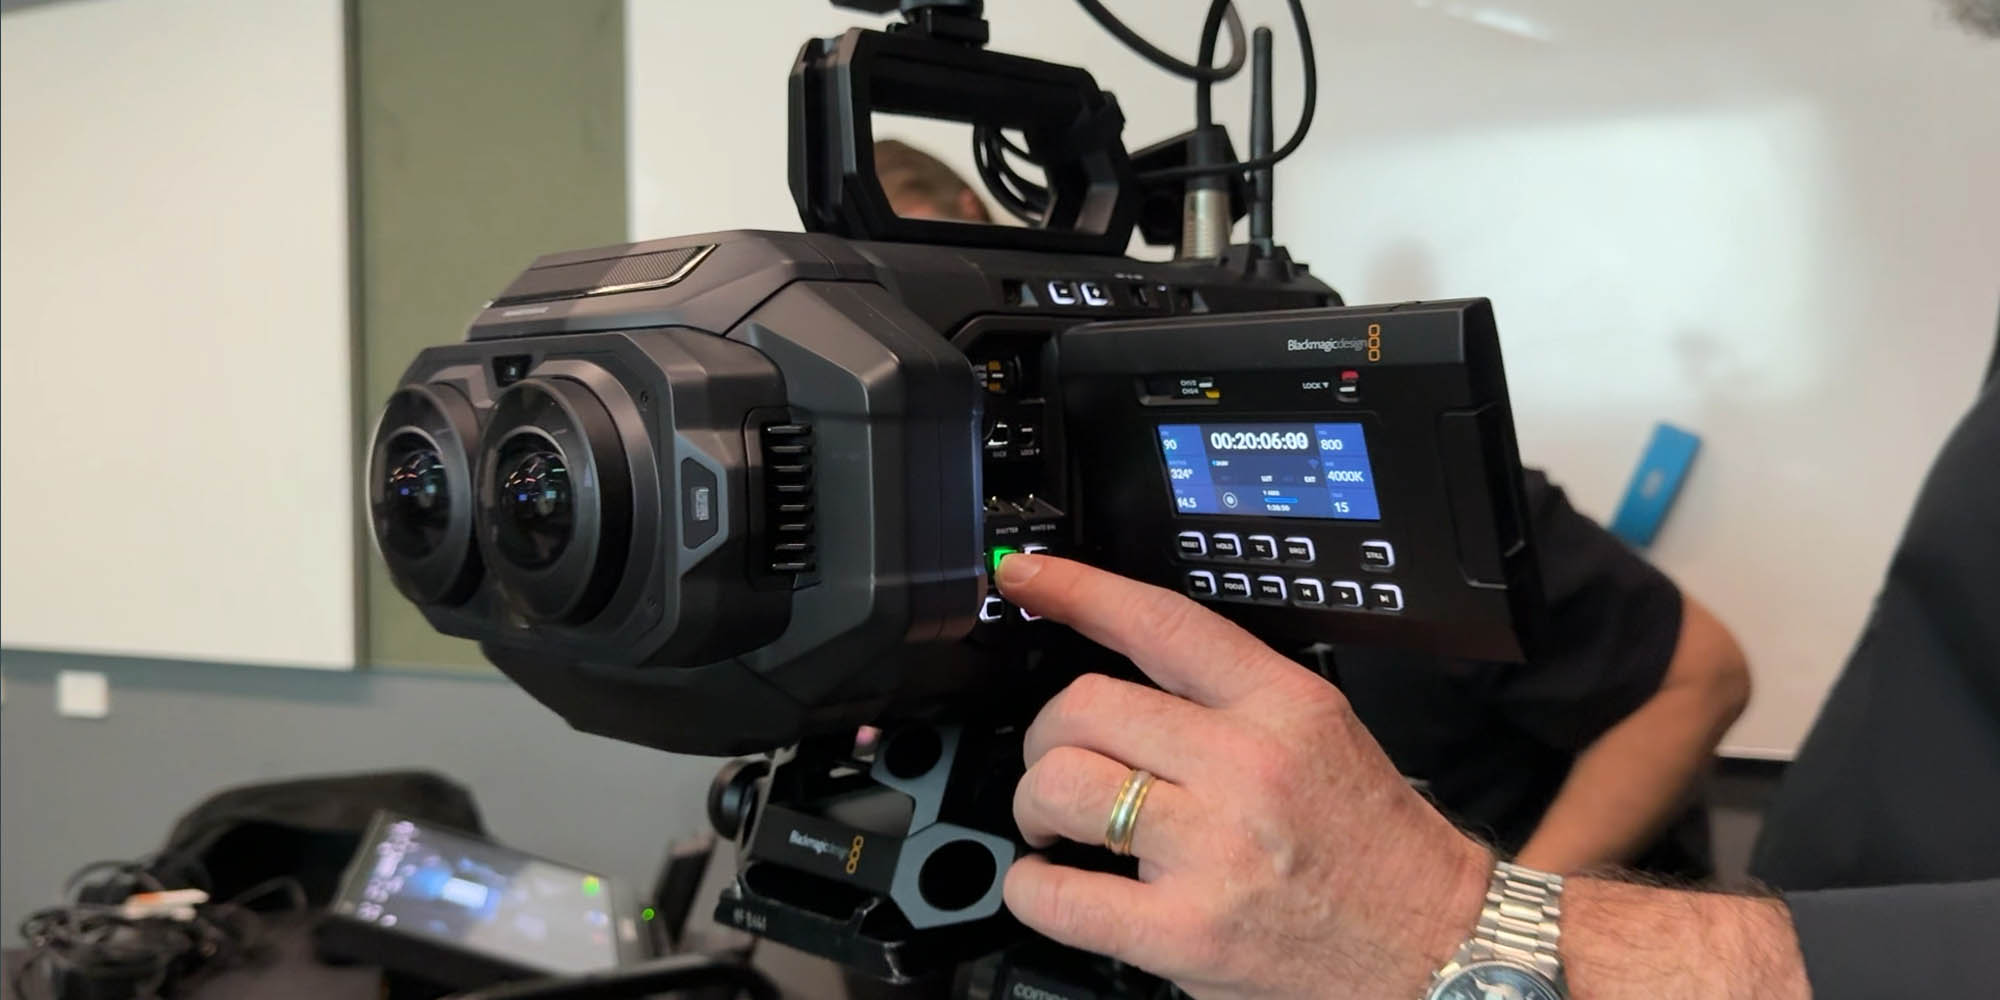
More than a year after the release of the URSA Cine Immersive camera and its associated tools in DaVinci Resolve Studio, conventional 2D versions of immersive productions remain rare. That scarcity hints at the challenge of translating an experience built around the viewer’s freedom to look around into one where the filmmaker controls the frame.
Here at fxguide, we continue to collaborate with MCF to explore the format’s creative and technical possibilities. That work includes stories on Proximity Perception Tests and The Dobos Connection, which was the world’s first narrative drama filmed with the URSA Cine Immersive camera.
Conceptual & Creative Challenges
Writer, Director and Editor Clara Chong said of the process, “The challenges are more creative and conceptual than technical, although there were plenty of technical issues to solve as well! Because the way we experience AIV is on a biological level, there’s a lot of things that we had to take into account in making the film and other factors that affect perception in normally framed formats differently to AIV, such as pacing. We have been attempting to get to a down-converted version of this over the last year, but are only now at the point where we’re happy enough with the results both in terms of technical quality and conceptual approach to have something we’re ready to release publicly”
Chong’s MCF co-founder, Ben Allan ACS CSI, served as cinematographer, as well as colorist and sound mixer on both Thé Fine Dining Bakery and The Dobos Connection. Allan needed to bring knowledge from all three specialisations to the downconversion process. “In Apple Immersive”, he explained, “the pan and tilt is controlled by the viewer in real time, so the images are composed to give them the freedom to look where they want, while guiding them to notice the important things. Converting to a traditional format involves converting that pan and tilt guidance into formal framing decisions”.


ProRes Pre-Renders
The original version of the documentary was rendered directly from the BRAW camera original files. Since then, a lot of changes have made it practical to use a workflow where the conformed edit using the original BRAW files can be rendered out to Stereoscopic 3D ProRes with things like noise reduction applied while retaining all of the essential metadata from the camera. This includes the ILPD which allows the Vision Pro to undistort the images correctly, along with the Apple Immersive Motion Data.
These ProRes pre-renders were one of the key components of the successful conversion. Once these were reconnected to the master timeline for the AIV remastered version, those files could be copied by the MCF team to a fresh project using Dynamic Project switching in Resolve.
Allan explained, “While it would be possible to create non-immersive resolution in an Apple Immersive Resolve project, it is not an option to go below 90 fps, and it was important for us to be able to create a standard format that would play anywhere, so 90 fps was out.”


Frame Rate & Project Format
The new project was created as a UHD 4K at 30 fps, and all of the clips from the original master timeline were copied as one into a timeline in this new project. The team also considered 24 or 30 fps but ruled out 60 fps early on. “We wanted it to be as filmic as possible and we knew that 60 fps would not give us that. The 90 fps of AIV is experienced more like smooth motion rather than what we associate with high frame rate images, but as soon as you go below that we get the traditional HFR effect at 60. Although we were tempted to go all the way down to 24, we knew that we would get a cleaner frame rate conversion from the proportional 3:1 change from 90 to 30, so we decided that was the best way to go,” said Chong.
When the clips were copied from the Apple Immersive master project to the UHD project, they brought with them all of the color grades as well. This required that the color management in the new project match the AIV master project, which in turn had to match the 2025 version that was done directly from the BRAW. Luckily, the team had made the decision to do the project in the DaVinci Wide Gamut Intermediate color space, so maintaining this was a simple process. DWG also makes more efficient of bit depth than something like ACES, which is better suited to 16 bit EXR files than the more practical ProRes pre-renders for the already large Apple Immersive images.


Color Management & Aspect Ratio
The 2025 original AIV release version and the 2026 remastered version, which was optimised for Static Foveation, were both mastered in PQ HDR 1000 nits, tone-mapped to 108 nits, as required by the specifications and for viewer comfort in the Vision Pro.
However, the objective for this 4K version was to create something that was as broadly compatible as possible, so the team decided to switch to a Rec.709 (Scene) Output Color Space. Allan noted that “We see this as another good reason to use Resolve’s Color Management and the DWG intermediate color space because it takes most of the complexity out of these sort of changes, without sacrificing quality or locking into something much more data heavy like ACES. With Immersive already requiring huge files, that difference in data is a world apart.”
The intent going into the process was to work in a 16×9 aspect ratio to also maximise compatibility, but Chong and Allan quickly realised they could get more a visually appealing framing from the Immersive shots by working within a 2.40:1 Scope aspect ratio. To maintain the 16×9 standard output format, this was applied as letterbox output blanking at the timeline level.
Chong elaborated, “It seems a little counterintuitive because the circular 180º image feels like it would be easier to fit to a more square frame, but as soon as we tried Scope, things suddenly started to work”. Allan added, “I think this is because we tend to look left and right more than up and down, so things that worked compositionally in full Immersive fit better into the 2.40:1 widescreen frame”.

Un-Distort Process
The process of creating an undistorted, flat image needs to be done in the Fusion VFX page of DaVinci Resolve Studio, and the MCF team ended up using two different approaches for different shots. The technically correct process and a variant that added some optical imperfections that felt right for extreme shots.
Both techniques can be done directly in the main timeline, switching to the Fusion page and are processed underneath the Edit and Color page adjustments and while this is mostly very effective, there are a couple of things to be aware of as well.
Allan explained, “Resolve has always been the best at switching between formats, so if you change a project from say HD to 4K then your titles, Power Windows, stabilisation all works exactly the same. But when you’re un-distorting an Immersive image from the fisheye lens space, there’s really no way to make all of that carry across, so all of those things need to be checked and adjusted for the different geometric space, not just the resolution change”.
The technical approach uses Fusion’s Immersive Patcher tool. To maintain the option of a 3D 4K version in future but also to enable adjustments on a single node, they added the Immersive Patcher on a node after a Stereo Combiner node used to convert the left and right eye streams into a single flow through the rest of the node tree, with the eyes processed as layers.
The Immersive Patcher is a simple but powerful tool that either distorts a flat image to Immersive fisheye, or undistorts an Immersive image to a flat format. It has Rotation controls for the X, Y & Z axes, which effectively function as tilt, pan, and roll, respectively, in camera terms. It also has an Angle of View control which determines how much of the 180º Immersive image gets mapped into the flat frame.
The Fusion page operates at the clip level so the undistorted image there is at the source resolution and in the camera’s 1.13:1 aspect ratio. This works well because it allows room to fine tune the framing in either the Edit or Color pages, particularly on the tilt axis. For the documentary, most shots stayed in the 65º to 110º angle of view range, with a few extreme shots going beyond that at one end or the other.
The second, less technically correct approach was to use a combination of a Transform node followed by between one and three Lens Distortion nodes. This allowed the team to create normal looking images which also had some tiny geometric imperfections from the interplay between the different nodes, creating a subtle hint of realism which fits with the real-world effects of optical glass, particularly with extreme lenses. “Even though the pictures from the Cine Immersive camera are, of course, actually going through real glass lenses, the sophisticated ILPD projection mapping actually removes all of these artefacts perfectly for viewing immersively in the Vision Pro, we found that occasionally it felt better with a bit of organic imperfection,” said Allan.

“Framing” The Shots
With one of these two approaches applied to each shot in Fusion, the next step was to reframe shot by shot to get appropriate framing.
On The Dobos Connection, the team collectively decided not to take easy “outs” for things that were impossible on the Immersive camera, like shooting macro, by shooting them on a traditional camera. The reasoning for this was to problem solve within the new format, rather than being able to fall back on standard solutions. MCF decided to apply the same logic to the reformatting of Thé Fine Dining Bakery.
While it would be tempting to re-edit a film for traditional formats, what many clients, distributors, and networks will likely require is a version of AIV films reformatted to play on normal screens, not a different cut of the film.
MCF decided not to attempt to make this the film that they would have shot on a traditional camera; instead, it would be the AIV film carefully reformatted for normal displays.
The self-imposed result of this was that they did not change anything outside the clip level. So adding a cut point within a clip was ok, but changing the overall timing or adding a different angle was not.
The result proves it is possible to take a film created solely for AIV playback in the Apple Vision Pro and reformat it to play on normal 2D screens.
Using the equivalent of pan, tilt and zoom to pick each shot out of the 180º image created something that was both watchable and recognisably the same film. But because of the pacing required when the viewer is fully immersed in the scene, this version seemed slow when played back normally.
Chong decided that the solution was to split some of the shots into multiple different shot sizes from the same source clip. What holds very effectively as a single perspective in the Vision Pro, can work much more effectively as two or even more shots, cutting between wide shots and close ups from the same original Immersive image.
While this became a more time-consuming process, balancing each variant of a shot against the others, the results were a dramatic improvement and actually made the experience closer to the perceived experience of the original.
For some shots, this required going either wider or closer than they otherwise would have, in order to have a big enough difference between the shots for a cut point to play smoothly.
Beyond these factors, Chong and Allan found that the framing rules of traditional filmmaking applied entirely normally. Techniques like looking room, head room and the rule of thirds all play their normal roles.

Taking Sound From Spatial To Surround
Like the way that Resolve is good at switching between different output formats, Fairlight in Resolve is very proficient at doing high-quality conversions between different audio formats.
Allan noted “It always surprises me how little usually needs to be done once something like a 5.1 or 7.1 mix is routed to a Stereo Bus. The conversion is much more effective than I expect based on past experiences and balances really well almost all of the time.”
Converting from the Apple Spatial Audio (ASAF) format is a very different challenge. Not because the software isn’t handling it correctly, but because the conceptual objective of the format is so different to any conventional, channel based format.
ASAF is designed to match precisely to the Immersive Video images, so instead of feeding the sounds to an array of speakers like almost every other format, sounds can be treated in a number of different ways including as objects freely positioned in three-dimensional space, sounds routed through an ambisonics bus and headlocked objects which follow the listener’s head movements.
All of this makes it impossible to simply convert a good ASAF mix to a traditional format, whether that’s mono, stereo, or any surround sound format, including Dolby Atmos.
The obvious solution would seem to be to convert to Atmos and then downconvert from there to all other formats required because of how well an Atmos master handles that process.
The first issue is that an ASAF Master Bus cannot be routed to any other type of bus. Even if it could be, routing the tracks to buses directly is also not a workable solution. Allan discovered this early in the process of mixing Thé Fine Dining bakery over a year ago “I thought that I could simply route all of the tracks that were going into the ASAF Master Bus to traditional submixes and feed those into surround or stereo buses for output. But what we learned is that the processing which happens to ASAF objects with object distance adjustments has significant effects on loudness, EQ and reverb. So basically 80% of what we do with sound mixing is completely different when they don’t go through the ASAF Master Bus. Because of this an ASAF mix which is sent directly to traditional buses, doesn’t just sound different, it is virtually unrecognisable and unusable.”
The gold standard would be to fully redo the mix directly for the intended down-conversion format, but this would not be like the traditional tweaks required for a Stereo downconversion from something like surround, but an almost entirely new mix with dramatic changes to the levels, EQ and reverb for every ASAF object track such as all dialogue, foley, spot effects and so on and the flow-on effects of this on music and background tracks.
So the MCF team identified two challenges in order to efficiently downconvert their ASAF mix to a conventional sound format. First, the sounds all needed to travel through the ASAF Master Bus in order to have a balanced starting point and this isn’t directly possible. Second, they needed to change the structure of the mix to fit with any format that is based on a speaker array rather than infinite points in three-dimensional space. This factor also relates to a spatial mix which is tied to Immersive images rather than images contained by the edges of a frame.
In trying to solve both of these challenges, Allan found inspiration from early in his career working in analogue radio and TV studios. “I often find when some digital challenge is particularly confounding, I go back to asking myself… how would I have solved this in the analogue world. Of course, there could be no ASAF in analogue! But the thought process still led me towards a functional solution.”
Allan realised that Fairlight was doing very effective monitoring conversions to whatever monitoring format was required. Everything from Stereo to 9.1.6 is supported for ASAF monitoring from the Fairlight page.
Allan recalls thinking “How did people produce things like M&E tracks of a manual mix with multitrack analogue tape? Well, they played back the multitrack source material and patched the main outputs from the mixer to the input for other tracks and recorded it down to those tracks.”
He was able to recreate a similar process to create stems from the ASAF mix that could be used as the basis for the new surround version. Using the app Loopback from Rogue Amoeba, they were able to create virtual outputs for stereo and 7.1 and select these outputs as the monitoring destination from the ASAF Master Bus. Using Fairlight’s Patch In/Out tool it was then easy to patch those virtual outputs to the inputs of new tracks, just as it would be in the patch bay of an analogue studio. Using VCA’s to mute all of the other tracks feeding to the ASAF Bus it became practical to record dialogue, music, foley, effects and background ambience down to separate tracks which could then be exported to become the basis of the conventional version of the mix.
Chong elaborated, “The obvious choice would be to do these all at the highest level of complexity possible, which would be 9.1.6 Dolby Atmos, but we realised through testing that this wasn’t actually what we needed”. Allan added, “Because standard practice for surround formats is that many sounds within the scene come from the centre channel, we needed to get those sounds into a form where they could easily be routed to the centre channel for the surround mix.”
By exporting the dialogue, music, foley and effects as stereo stems they could be panned in the down converted mix the center, L&R or surrounds as required. The room tone & ambience tracks were done as Ambisonics 360º, so these were exported as 7.1 to maintain a sense of the space.
This then provided a very effective basis for the 7.1 mix, which was refined with only basic adjustments. Similar to the reasons that the team settled on Rec.709 for the pictures, 7.1 was chosen for simplicity and broad compatibility, while still having scope for a rich surround conversion.

The Results
While the process was more extensive than anticipated, the resulting version of the documentary demonstrates that it is possible to do a format conversion from AIV that is both aesthetically and narratively effective and works well from a technical quality standpoint.
Chong stated, “Once the conceptual questions fell into place, we were very happy with how effective the process was for both the pictures and the sound.” Allan added, “For anyone who has seen the full Immersive version of this film, the reformatted version should feel like the same film, just adjusted to sit correctly on a normal screen. While it can’t reproduce the immersive experience, for anyone who doesn’t have access to a Vision Pro, it means that they are able to see this film for the first time.”
For projects considering AIV, the fact that an entire film can be successfully converted to standard formats opens up many possibilities and makes Apple Immersive Video and URSA Cinema Immersive more viable for a wider range of productions.
来源:fxguide · fxguide.com